The tradition of dyeing Easter eggs is a cherished ritual that heralds the arrival of spring, symbolizing renewal and life. In recent years, there’s been a significant shift towards more sustainable and health-conscious practices, with many opting for natural dyes over their synthetic counterparts. This post dives into the world of natural dyes for Easter eggs, offering a guide to creating vibrant and unique decorations using ingredients found in your kitchen or garden. Beyond the aesthetic appeal, using natural dyes is a step towards eco-friendly living, combining the joy of Easter traditions with the benefits of environmental stewardship.
The Charm of Natural Dyes

Natural dyes offer an eco-friendly alternative to synthetic dyes, celebrated for their safety, environmental benefits, and unique hues. The process of using natural ingredients to color Easter eggs connects you to ancient traditions, where dyes were derived from nature’s bounty. This method reduces exposure to potentially harmful chemicals and introduces a palette of soft, earthy tones that synthetic dyes can’t replicate. The charm of natural dyes lies in their unpredictability and the way they can vary with different base egg colors, ingredients, and dyeing times, inviting a beautiful spectrum of outcomes.
The use of natural dyes is deeply rooted in history, tracing back to ancient civilizations that valued colorants extracted from plants, minerals, and other natural sources for their artistic and ceremonial significance. These traditional practices underscore a harmonious relationship with nature, where the changing seasons and available resources dictated the colors and patterns adorning materials and objects, including eggs. Embracing natural dyes today reconnects you with these traditions, offering a moment of reflection on the cycles of nature and the importance of sustainable living practices. It’s a celebration of spring that respects the environment and enriches your Easter festivities.
Preparing Your Eggs for Dyeing

Before embarking on the journey of natural dyeing, it’s crucial to properly prepare your eggs to ensure the dyes adhere well and produce vibrant colors. Start by cleaning the eggs gently with water and a little vinegar to remove any oily residue, which can create uneven coloration. Whether you choose to dye raw, boiled, or blown-out eggs, this step is vital for achieving consistent results. The preparation phase also includes deciding between white and brown eggs, as the base color can significantly affect the hue and intensity of the natural dyes.
Choosing between white and brown eggs is a matter of personal preference and the desired outcome of the dyeing process. White eggs serve as a blank canvas, allowing the natural dyes to show their true colors, while brown eggs can produce deeper, richer tones that add a unique dimension to your Easter egg palette. Experimenting with both types of eggs can yield a surprising range of colors and shades, encouraging creativity and exploration. This preliminary decision plays a significant role in the dyeing adventure, setting the stage for the magical transformation that follows.
Common Ingredients for Natural Dyes
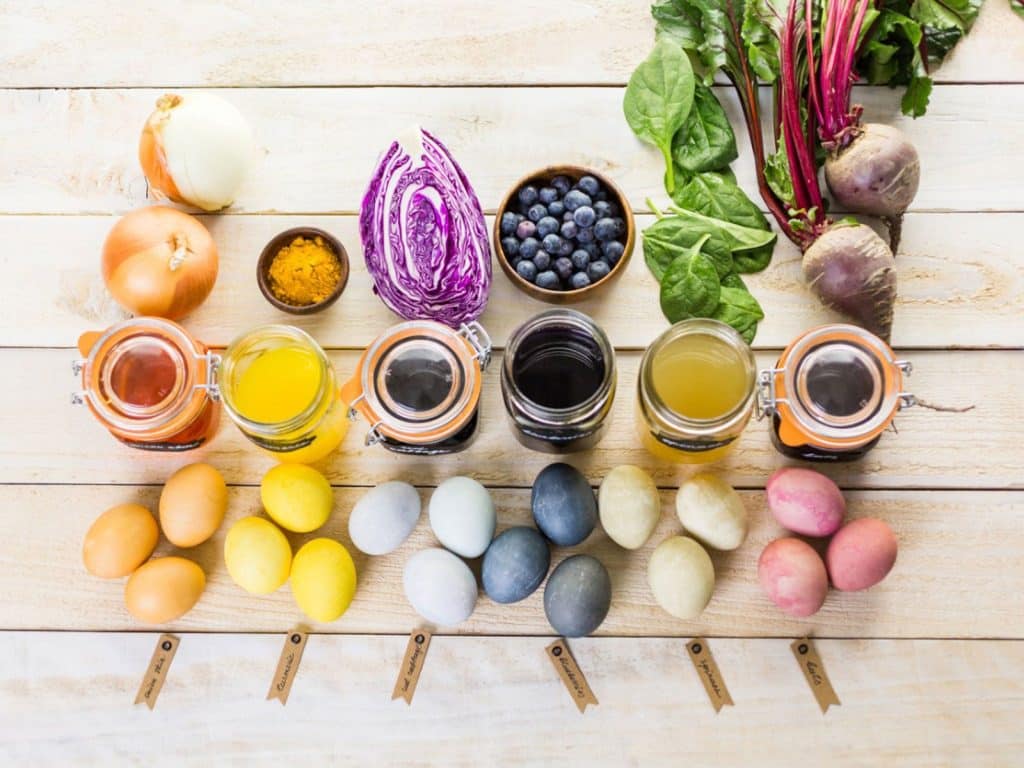
The quest for natural dyes begins in the kitchen or garden, where a variety of common ingredients await their role in your Easter egg project. From the golden hues of onion skins to the deep purples of red cabbage, natural dyes are all around you, waiting to be discovered. Turmeric, beetroot, and coffee are just a few examples of the ingredients that can transform plain eggs into works of art. Each ingredient offers a different color spectrum, and combining them can create an even wider array of shades and tones.
Exploring the colors that these ingredients yield is an exciting part of the process. Onion skins, for instance, can produce anything from pale yellows to deep oranges, depending on the dyeing time. Red cabbage, surprisingly, creates a stunning range of blues, while turmeric offers a bright, sunny yellow. Beetroot imbues eggs with a range of pinks and purples, and coffee gives a natural, earthy brown. This exploration into the natural color palette enhances the Easter egg dyeing experience and fosters an appreciation for the colors and materials provided by nature.
Creating a Rainbow of Colors
Achieving a rainbow of colors with natural dyes involves understanding the basic principles of color mixing and the effects of pH levels on natural pigments. For example, adding a bit of vinegar to the dyeing solution can brighten or alter the hue, as the acidity helps the color adhere better to the eggshell. Creating a blue dye with red cabbage involves simmering the cabbage in water, which releases a natural dye that, with the addition of an acidic ingredient like vinegar, adheres to the eggs and produces a vibrant blue.
Experimentation is key to mastering the art of natural dyeing. By adjusting the amount of each ingredient, the pH of the dye bath, and the soaking time, you can achieve a wide range of colors and intensities. Turmeric, for instance, can dye eggs from a pale yellow to deep gold, depending on how long the eggs are left in the dye. The process of discovering how each variable affects the final outcome is a rewarding part of creating Easter eggs with natural dyes, encouraging creativity and a hands-on connection with the materials.
Tips for Vibrant Colors
To achieve the most vibrant colors possible with natural dyes, it’s essential to understand the nuances of the dyeing process. One fundamental tip is to ensure that the dye solution is concentrated enough; this might mean simmering your natural ingredients for longer than you initially think necessary. Adding vinegar to the dye bath is another crucial step, as the acidity helps to fix the dye onto the eggshell, resulting in brighter colors. Furthermore, the temperature of the dye when the eggs are submerged can affect the vibrancy of the outcome—warm dyes tend to impart colors more effectively than cold dyes.
Another technique for enhancing the color intensity is to leave the eggs in the dye for extended periods, even overnight in the refrigerator, to deepen the hue. The type of eggshell can also play a significant role; porous shells tend to absorb and hold onto the dye better. Experimentation with different mordants, substances that bind the dye to the eggshell, can also offer exciting results. For example, alum can be used for some dyes to achieve brighter colors. It’s a process of trial and error, where each batch of eggs and dye can yield uniquely beautiful results, encouraging the dyer to continue experimenting with different combinations and techniques.
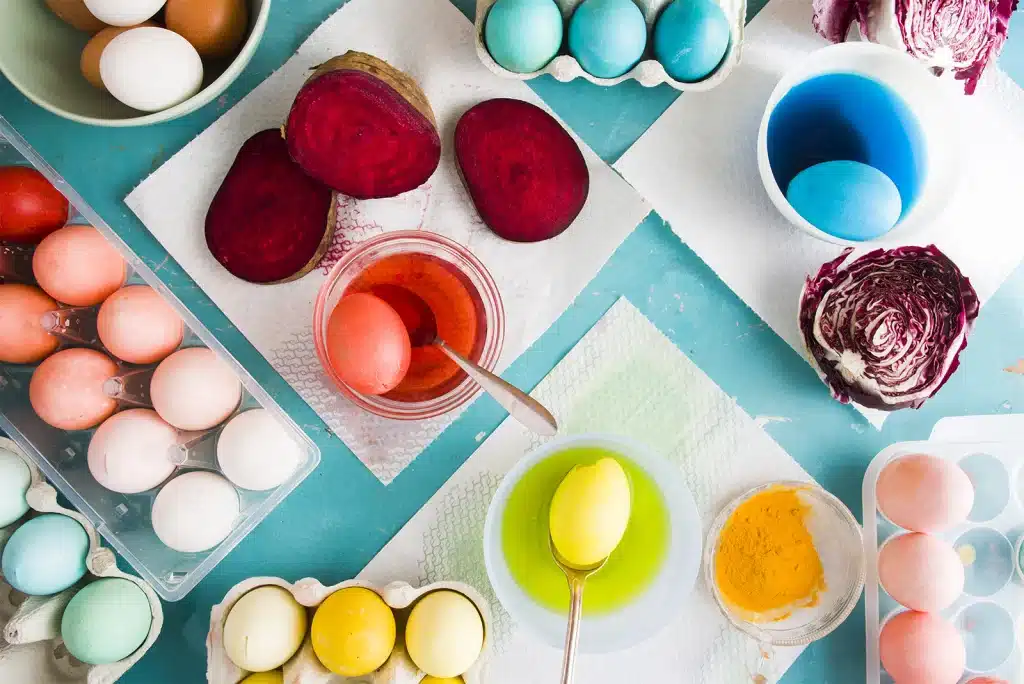
The Dyeing Process
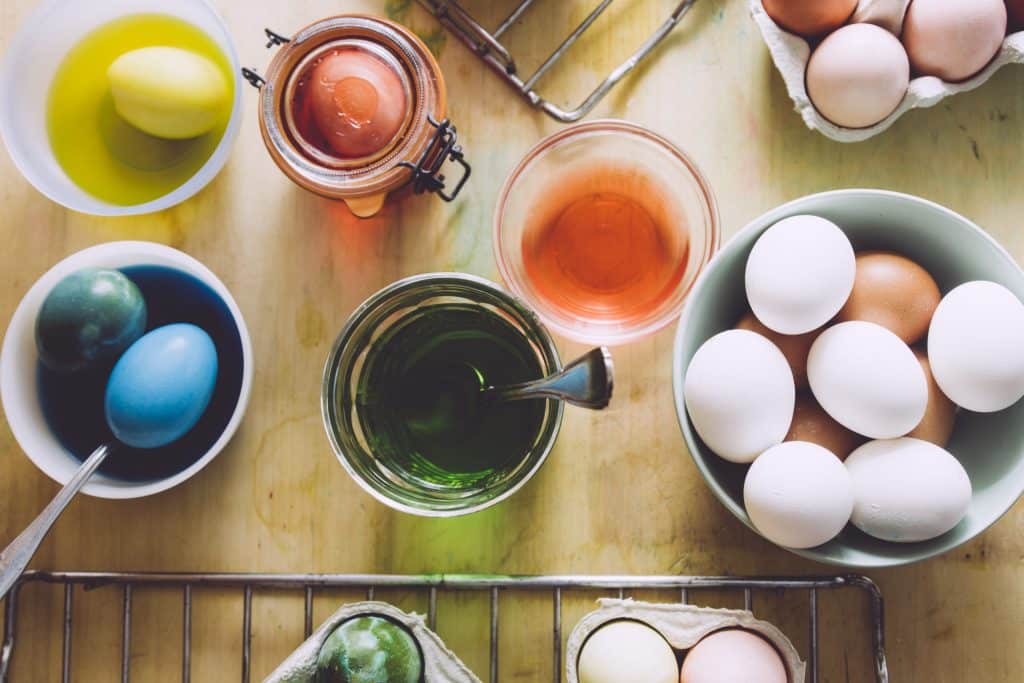
The dyeing process for creating beautifully colored Easter eggs with natural dyes is both an art and a science. Begin by preparing your dye baths using the natural ingredients of your choice, simmering them until the water is deeply colored. Strain the mixture to remove any solid particles, then let it cool to a safe temperature before adding the eggs. For a more hands-on approach, eggs can be added to the pot while the natural ingredients are still simmering, allowing the colors to infuse gradually as the water cools.
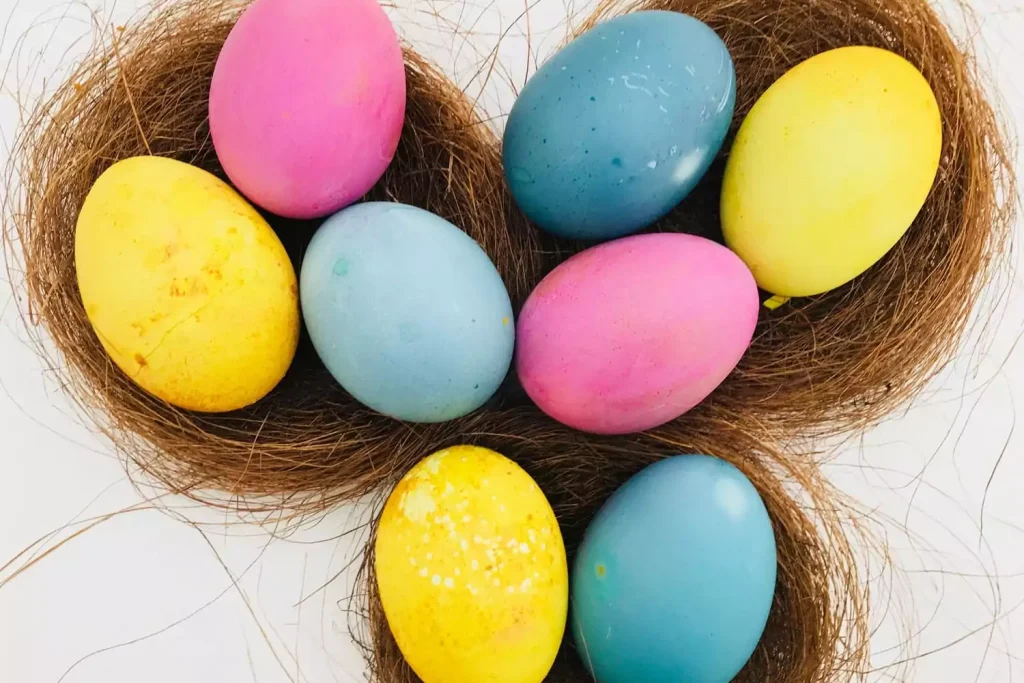
The length of time eggs remain in the dye affects the depth of color. For subtle, pastel shades, a short dip might suffice, while deeper, richer tones may require the eggs to be left in the dye for several hours or overnight. The eggs should be turned occasionally to ensure an even color distribution, especially if they’re not completely submerged. Once the desired color is achieved, carefully remove the eggs from the dye and allow them to dry on a wire rack or paper towel. This methodical process yields stunning results and provides a fulfilling experience of crafting and creativity.
Patterns and Designs

Incorporating patterns and designs into your naturally dyed Easter eggs adds a personalized and artistic touch to the tradition. Before dying, eggs can be adorned with leaves, flowers, or other small objects, which are then held in place with a piece of pantyhose or fabric, securing them tightly around the egg. When dipped in the dye, the areas covered by these items resist the color, leaving a natural imprint of the pattern on the shell. Another method involves using wax crayons or candles to draw on the eggs before dyeing; the wax repels the dye, allowing the artist to create intricate designs and motifs.
For those interested in more abstract or modern designs, rubber bands wrapped around the eggs can create interesting stripes and patterns once dyed. Experimenting with different wrapping techniques and the application of dye with sponges or brushes can also yield unique effects. The beauty of using natural dyes lies in the variability and unpredictability of the results, which means that each egg is a surprise waiting to be unveiled. These techniques add depth to the dyeing process and allow individuals and families to express their creativity and make each Easter celebration uniquely their own.
Unleash Your Easter Creativity with Natural Dyes
Embracing the tradition of dyeing Easter eggs with natural ingredients adds a unique charm to your holiday festivities and fosters a deeper connection with nature and sustainable practices. As you explore the myriad hues that kitchen and garden can offer, let your creativity bloom and share the joy of crafting these eco-friendly treasures with loved ones. This Easter, make the switch to natural dyes and transform your celebration into a vibrant, environmentally conscious gathering.